Tuesday, December 3, 2013

Magnetic Family Home Evening Board

Our ward had a Super Saturday activity last month.
I was asked to teach the ladies how to make a Family Home Evening (FHE) board.
I have been needing one for a little while now.
I started doing some research on what I wanted.
I knew that I wanted a magnetic board,
but I did not want to deal with sheet metal.
I couldn't find anything that I really wanted to do that was inexpensive and easy.
I also don't have a cricut or silhouette machine to cut vinyl.
I headed to Photoshop and came up with the following layout,
as well as the different colors and fonts to chose from.
 The ladies only had to pick the color and font and I got the rest of the supplies.
It ended up costing only $5 for the entire craft!
That includes one small bottle of ModPodge divided 5 ways.
If you don't already own ModPodge, it will cost more. 

Supplies Needed:
- 11x17 color copy (on cardstock) of the FHE paper
I got them printed at the UPS Store for $.98 a piece
- 9x13 cookie sheet
I found them for $.92 each at WalMart
You will need to drill two holes at the top, see below
- 1 bottle of Matte ModPodge
- 1 Foam Brush
- Wooden spoons spray painted lightly with white
I found these at my local dollar store, 100 for $1
- Magnets, 2 per spoon
- Ribbon to match color of FHE layout sheet

Instructions:
1. Take your FHE paper and cut it out, make sure that you round the corners.
2. Lay it on the back of the cookie sheet to see if it fits.
You do not want any part of the paper curving up the side of the cookie sheet.
The paper needs to be completely flush (lay flat) on the cookie sheet.
 3. Once that is done, drill two holes on the top of your cookie sheet.
I did not take a picture of this, my husband did it for me.
I put a mark at the 2" and 7" point with a sharpie.
My husband drilled an initial 1/8" pilot hole.
From there, he did a 1/4" hole.
If you go any bigger than that, the hole will not be a clean cut and will destroy your ribbon.
4. Put a nice even layer of ModPodge on the back of the cookie sheet.
You don't want blobs of ModPodge, just enough to glue the paper to the cookie sheet.
 I decided to put the FHE paper on the back of the cookie sheet for one main reason.
You can store you unused spoons inside the cookie sheet and
it will still hang nice and flat against your wall.
Does that make sense?
 5. Take your hand and smooth the paper against the cookie sheet.
 5a. Make sure that the edges are glued nicely to the cookie sheet.
I took my finger and rubbed it around the edges to make sure it was secure.
It only has to dry long enough for the paper to not slide around anymore,
only about 1-2 minutes.
6. Put a nice amount of ModPodge on top of the paper.
Spread it evenly with your foam sponge.
Make sure that you brush in long strokes that move in the same direction.
 6a. I took my finger and spread the ModPodge around the edges
(to make extra sure that it was secured to the cookie sheet),
then used my brush to even out the ModPodge, so the strokes matched.
7. Let it dry for at least 30 minutes.
You can do a second coat if you would like, but it is not necessary.
I did a second coat because my brush strokes weren't as even as I liked.
8. Write your names on the spoons with a fine point Sharpie.
9. Hot glue the magnets to the back of each spoon.
One magnet would have been sufficient, but I could not put
one magnet in the center, or it would have been visible.
That is why I used two magnets for each spoon, one on each side.
10. Feed your ribbon through the holes and tie a bow.
Be careful with pulling the ribbon through the holes.
The hole is not going to be smooth and
could shred your ribbon if you pull it too much.

If you are interested in one of these custom made FHE papers,
leave me a comment with your email address and I will see what I can do.

Thursday, October 24, 2013

Delicious Eggless Chocolate Chip Cookie Dough

I am 25 weeks pregnant with my second girl. I had the most difficult time avoiding my chocolate chip
cookie dough with my first pregnancy. I love the dough baked into cookies, but there is something about the dough that I love even more. I happened upon post a month or so ago for chocolate chip cookie dough cake pops. She said to substitute 2 TBSP of milk for every egg. I would give her credit, but I can't find the post. I had the hankering for something sweet that day and decided to try it with my very own chocolate chip cookie recipe. I cut my normal recipe in 1/4, in case it didn't work out. Oh my goodness! The dough tastes EXACTLY like my regular cookie dough. I am in big trouble since I discovered this.  Now I need to practice self-control and limit my quantity.


I need to make a little disclaimer.
This recipe is NOT intended to be low fat or low sugar. I am a firm believer in eating things how they are supposed to be made. I do eat very healthy while I am pregnant. There are sometimes that you just need something sweet. I created this recipe strictly to have cookie dough balls that I can eat while I am pregnant or nursing.

 
Holli's Eggless Chocolate Chip Cookie Dough
Prep: 10-15 min
Yield: 30 cookie dough balls
Nutrition Information: 92 calories per dough ball
But you can forget that last line if you want!

Ingredients:
1/2 cup white sugar
1/2 cup brown sugar, firmly packed
1 cube butter, softened
2 TBSP milk
1/2 tsp vanilla
1/4 tsp salt
1 1/2 cup flour
3/4 - 1 cup chocolate chips
(however much you desire, I prefer less chocolate and more dough)

Directions:
1. Mix sugars and butter until well combined.
2. Add milk, vanilla, salt, and mix until smooth.
3. Add flour and mix until well combined.
4. Add desired amount of chocolate chips and mix again.
5. Scoop dough out on to a tinfoil lined cooking sheet.
6. Put in freezer for 1-2 hours.
You can see that I snuck a few dough balls before I put them in the freezer. :)
7. Store in an airtight bag or tupperware.

Let me know if you try the recipe and if you like it.
Meanwhile, I will sit back, continue watching game 2 of the World Series, and snack on a few dough balls.

Thursday, March 14, 2013

DIY Striped Maxi Skirt

A few weeks ago I was on Pinterest looking at DIY crafts and I came across this.
Someone had pinned it as a DIY maxi dress.
I clicked it to see if it actually went to a pattern...nope...$196 for a dress.
Really?!?!
$196 for that? Sure it's cute, but not $200 cute.
I don't think I've spent that much money on clothes in one shopping trip.
I decided that I could make a skirt similar to that one.
I started working on it a few days later and this is what I came up with.

 I made the black and red one first and received such a huge response from my friends on facebook,
that I decided to make a grey and white skirt and include a tutorial.
This is my first sewing pattern that I have created, bare with my instructions.
This pattern is mine. You are free to use it to make skirts for yourself, friends, and family.
You are not allowed to sell this pattern. 

First, you will need a jersey knit material.
Jersey knit can be $10 a yard on sale up to $15 a yard regular price.
A little bit too pricey for my wallet.
I was walking around WalMart a few months ago and found these jems.
Jersey knit sheets for $20 each!!
They have been sitting in my material closet for too long without being touched.
Make sure that you wash them BEFORE you cut your pattern.
Second, you need to figure out what size to make your skirt.
 Luckily I have figured all of that out for you.
I have two documents for you to download.
The first one is the math page. Don't get worried because I said math!
I color coded the documents to make it easier for everyone.
The second document is my quasi-pattern.
When you see the pattern page, you will see that each block tapers out 1/4" to 1/2".
That is so the skirt will be flared just a little bit.

Third, you need your elastic.
When it comes to elastic, I cannot stand having thin elastic that rolls.
Grrr!!
I found non-roll elastic at Walmart for $1.77 for 2 1/2 yards.
This elastic is brilliant!
I didn't know this was out there until I went looking for it.

Now you can grab your washed material, scissors, sewing machine and get started.
It only took me 3 1/2 hours to finish one skirt.
You will need to excuse the pictures.
I had to wait to cut my material when the halfling was in bed for the night.
I don't have the best photography lighting in my living room.
:)

Once you have decided what colors you will use, take your first piece of material and fold it in half.
Look at all of that material! And that is only the flat sheet from each set!

It will be difficult to get a perfect fold with jersey knit.
I spent a lot of time trying to make the fold perfect.
Then it hit me, why don't I carefully slide my rotary cutting mat in between the material?
Then I held the material with one hand and pushed the mat against the fold.
Viola! The ripples were gone!
Cut a straight edge on one side of the material.
I had to cut off the hem of the sheet.
I wish I could have used it, but the ripples were just too much for me.
 I had my measurements of how big one block needed to be from my math sheet.
Once I laid my ruler on my material, I put a post-it where I would need to cut to.
Less waste of precious material.
You see how my ruler is at a diagonal?
 I would cut the long end of the block first, then use the measurements on the mat to cut my diagonal needed for my block.
Does that make sense?
I had 12 little pieces of paper with numbers 1 - 6 on them, since I had to cut two of each block.
Once I cut one block, I would pin the number that the block went to.
Then I didn't have to hope that I had them in order.
 When they are all cut, lay them out in the order that they needed to be sewn together,
making sure that you didn't forget to cut any blocks.
 Take one side of the skirt and unfold each block,
keeping them in the same order that they need to be sewn.
Make sure that right side of material is facing toward you, not the ground.
I believe that there is a right side of material to jersey knit.
From left to right they are numbered 1 - 6.
1 being the waistband piece.
 Take the top of piece 5 and fold it down to the bottom of piece 6.
You can see the grey peaking out from underneath the white.
That means that you are sewing it together properly.
Sew pieces together using the side of the foot as your seam.
The nice thing about jersey knit is that it is stretchy.
If one piece wasn't cut a long as another, you can always stretch it.
Take the top of piece 4 and fold it down to the bottom of piece 5.
You can see the white peaking out from under the grey.
You need to be careful with jersey knit, it will roll on you.
Make sure that your material is flat when you sew.
I had to sew a little bit slower so I would have the material flat and even.
If your seam ends up looking like this, don't worry. Your skirt will still look fabulous.
Continue with remaining blocks.
Once you are done with one side of the skirt, serge all of your seams to reinforce it.
If you don't have a serger, do a zig zag stitch on your seam.
Repeat that last few steps for the next side of the skirt.
Now you have two identical skirt pieces.
 Here is where it gets easy.
 Place each skirt piece right sides together.
Match up the seams and pin.
Sew down each side seam of the skirt.
Once you have sewn both side seams, serge or zig zag your seam.

 Time to install the elastic.
This is how I did it, and it was really easy.
I pinned the elastic to one of the side seams.
I left a little gap between the seam and the elastic.
 Fold up the serged seam and place bottom of elastic right next to it.
 Fold the top of the material over the elastic and line up the edge of the waistband
material with the serged seam. 
Start sewing 2-3 inches past the seam.
When you start running out of elastic, hold the material behind your machine and gently pull the elastic.
If you have sewn the waistband properly, none of it will be sewn into the seam.
Pull enough elastic so you can finish the waistband, which should only be about 5-8 inches.
Stop sewing the waistband 2-3 inches before your starting seam.
 Pull elastic out and fold over 1-2 inches.
 Zig zag stitch at both ends of elastic.
At this point, try your skirt on and see if you like how the elastic feels.
If it is too tight unpick your zig zag and make your fold smaller.
If it is too loose, cut your zig zag out of your elastic and refold and sew.
You should end up with a waistband that looks like this.
 Last step, hem your skirt.
You will want to put your skirt on and see how much you can hem it.
I wanted my skirt to fall right to the ground.
I serged the raw seam, folded it over, sewed it.
Then folded it again and sewed it again. 
 Huzzah! You have finished your striped maxi skirt!
Let me know if you try this "pattern".
I want to hear if you liked it and if it made sense.
If you have any questions, let me know and I will try to answer them to the best of my ability.

Cheers,

Holli

Saturday, February 16, 2013

Firefighter Embroidery Pattern

My boss is a local volunteer firefighter.
She asked me to digitize and embroider this design for her.
Here is how it turned out.
I created the embroidery design for my Brother sewing machine.
The file is in .pes format.
If you want it, let me know.

Friday, February 15, 2013

Valentine's Day Card

I saw an image of this card going around on Pinterest.
I thought that this would be a hilarious card to make for my husband this year.
Since there was only an image going around Pinterest,
I thought I would make a quick tutorial of how I made the card.

I started by doing a google image search for "hammer clipart".
I ended up find this one and I used it for my template.

If you want to download it, click the picture, then right click on it and click save as...

I cut out the star with pink construction paper and outlined with a red marker.
Then I cut the hammer handle with brown construction paper and outlined with a black marker.
I used grey construction paper for the hammer head and outlined with a black marker.
Then used a small heart punch on red paper for the nail heads, which I drew smiley faces with a black marker.
Then I cut little purple slivers for the nail bodies...is that the right word?
I took 1 piece of white cardstock paper and folded it in half for my card.
Here is a picture of all of my supplies.
 Then I glued it to the cardstock paper with a glue stick.
Then I wrote my message.
My husband reaction was priceless!
He said that it was cute and told me that he loved it.

It is a perfect card idea for the love of your life that has a sense of humor. :)

Wednesday, February 13, 2013

Breakfast B.L.T.

I used to work for a company in Utah that had an amazing cafeteria.
I discovered that they had this DELICIOUS breakfast sandwich called a Breakfast B.L.T.
Since I was an employee, I only had to pay $2.50 for it.
I ate it quite often.
My husband and I decided to recreate it a few years back.
I had bacon in the fridge that needed to be used, so we had this for dinner tonight.
I took very thorough picture instructions of how to make it.
:)
This is just how I am.

Ingredients (for 2 sandwiches):
  •  4 eggs
  • 1 TBSP milk
  • Salt & Pepper
  • 3 pieces of bacon, cut in half
  • 1 tomato
  • 1 lettuce leaf
  • 4 slices bread
  • Butter
  • Mayonnaise
- Cook bacon until crisp on medium heat (3-4 minutes per side).
          - If you have a cast iron bacon press, place it on the bacon after it has been turned.
It will help the bacon cook more flat, which will sit better on your sandwich.
These are AMAZING to have in your kitchen!
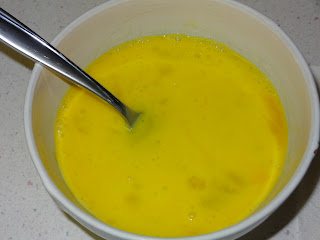
- While bacon is cooking, crack eggs into bowl.
- I know my picture shows 5 eggs, but it ended up being WAY too much egg for 2 sandwiches.
- Add milk to eggs.
- This will make the eggs more fluffy and creamy.
 - Use a fork or a whisk and scramble the eggs.
- Once bacon is cooked, place on a paper towel to cool off.
 Doesn't that look delicious??
- Drain bacon grease from pan, don't wipe grease out, just let it pour out of pan.

 Here is our little secret of discarding bacon grease.
Put tinfoil in a GLASS container.
Pour grease into tinfoil lined container.
Carefully add 1-2 ice cubes.
You can see how the grease is bubbling like crazy.
Water and hot grease are dangerous.
Ice cubes and hot grease are less dangerous and it cools it quicker. 
Let sit for 30 min and grease will solidify.
Grab tinfoil by the sides, wrap it up and throw it away.
Or you can save it and use it in your cooking.
 **You might think I'm silly in posting this...my husband did.
But I never thought about discarding grease this way until we met.
It is very handy!**

- Pour eggs into bacon greased pan on medium heat.
 - Let eggs cook until bottom is completely cooked (approx. 4-5 min).
Do not salt eggs at this point.
Salt will actually change the texture of eggs.
Eggs shouldn't be salted until the last minute of cooking time.
 - Flip egg over.
- Salt and Pepper to taste.
I didn't do a very pretty job of flipping the eggs, but it still tasted delicious.
 - Butter your bread with a thin layer of butter.
- Toast in toaster oven until golden brown.
 If you don't have a toaster oven, broil the bread in your oven.
Move the rack to the top position and broil for less than 2 minutes.
Keep an eye on it. It will burn REALLY quick.

- Add mayo to your bread and assemble your sandwich.
The following order is from top of sandwich to bottom:
  • Bread
  • Tomato
  • Lettuce
  • Bacon
  • Egg
  • Bread
 Hmmmmm....this tastes AMAZING and it is so easy to make!

If you want to save calories:
- Leave out the butter and just toast the bread.
- You can also omit the mayonnaise.

If you don't care about calories:
- Use pesto mayonnaise in the place of regular mayonnaise.
- Add an extra layer of egg.
- Add more bacon.

Let me know if you try it!